Below are some examples of how carved brick relief can be used. Enjoy the possibilities!
 "Wind Spirit" 3'x6' wall mural with 3" basin for water in the brick base. Water allows viewer to see the wind. This was my first large carving, burgundy brick, flash fired.
 My first carved relief brick bench ""Earth Elements" donated and installed on the CCCC campus in May, 2010, burgandy brick, flash fired.
 "Sunflower Bench", my second bench, installed outside my studio (photo is before firing & installation).
 My first carving, 8"x8", on 2 small brick installed in the brick edging of the patio outside my studio.
 "A Good Day",4'x6' wall mural, very low relief of no more than an inch. Standard brick are set on edge rather than laid flat. Black Diamond brick, flash fired.
  "Strike",18"x24" relief, framed and free standing (photo shows the carving before it was fired) Completed relief was donated to KOOD for their fund raising art auction, burgandy brick, electric kiln firing, cone 6.
 Two 12"x8"x4" brick sculpted into Kansas Sunflower form, burgundy brick, flash fired. This piece is free standing and can be placed indoors or out. burgundy brick, flash fired.
 View 1--Leadership-- of Phi Theta Kappa two and a half brick free-standing sculpture (approximately 18" high by 8" square base), commissioned as a gift from PTK 2013 graduates to CCCC, burgandy brick, flash fired with white latex paint on top that was fired into the clay during the regular flash firing of the brick.
 View 2--Service
 View 3--Scholarship
The following is the documentation of the process of creating a brick relief sculpture from the initial idea to the completed sculpture to the installation process. I hope you find this documentation both informative and interesting.
 Original sketch for Sunflower bench.
 Sketch of the layout of each layer of the bench so that dimensions and number of brick could be figured.
 Layout of top layers of the arms and back of bench and figures for dimensions and number of brick.
 Beginning of model for bench.
 Completed side of model
 Sketch for carving the back of model.
 Completed back of model.
 Design drawn on side of model.
 Partially completed side of model.
 Completed side of model.
 Beginning front of model.
 Completed front of model.
 Rex Sicard, CCCC, unloading palettes of brick into Relief Sculpture room.
 First layer of brick laid out. Notice that the OUTSIDE RING of brick are the numbered bricks and are the bricks that will be fired and part of the sculpture. The bricks marked with an "X" will not be fired. They are used to fill the center cavity of the bench that will be needed to hold up the seat in order for it to be carved.
  Base of the sculpture including the seat layer.
 Arms and back added.
 Ready to draw the design onto the actual bench using the model to draw the design. Front of bench.
 Side of bench with drawing completed using model.
 Short cut: Use a wire cutter to remove large areas of clay. This is much faster and more efficient than using loop tools. After a little practice, you can use this technique to finesse some details.
 Close up of using wire cutter.
 Another close up.
 Completed front view of Sunflower bench.
 Side of bench completed.
 Side and back of bench, completed.
 Completed back of bench.
 Back and side of bench completed.
 Side and front of bench completed.
 When taking the bench apart to be fired, you need to make detailed drawings of the layers including details of brick shape and the layer and brick numbers.
 Take photos of each layer also as another reference to use with the drawings.
 I stamp the layer and number into the brick as it is easier to read than letters and numbers drawn into the clay. Of course, this has to be done while the brick is still wet.
 Because I knew it would be awhile before this bench was installed, I made detailed written note IN THE CLAY, drawing arrows to indicate which direction the brick would lay in the layer as well as any other notes I felt would help me in putting the large, layered puzzle back together again!
 Destiny Gunther, left, and Diane Koozer, right, were my work studies during this time period, and they were a GREAT help in assisting me in the labor intensive job of dismantling the sculpture.
 This shows the bricks that have been taken down from the sculpture, placed on palettes and wrapped in plastic. They are now ready to take to the brick plant for firing. The bricks need to be moved while they are wet to decrease the chance of the bricks cracking or breaking. At this point, Rex had to come load the palettes back into the pickup with the fork lift. The pickup only held two palettes at a time with it taking about 45-60 minutes per trip to the brick plant and back to the college.
 After the brick is fired, I would go to the brick plant to pick up the palettes of fired brick, again two palettes at a time with Mark at the brick plant, loading the palettes for me. Then the palettes went back to the college where each brick was unloaded one brick at a time by hand. The sculpture was actually set up at the college without mortar for a year and put on display for the students and for any art events on campus. Then finally it was loaded by hand again, this time with the help of my work study Kelsey Kahrs, into my car, a few brick a day, for the trip to my studio in Downs, KS. When I got to my studio, I unloaded each load by hand by myself to be stored until I could find a mason to install the bench in front of my studio. Each brick weighs approximately 20 pounds fired, 30 pounds wet.
 At this point, I had finally found a mason and needed to lay out the brick by layer, A-K, and number, 1-11. Since they had been moved so many times, they were very mixed up. It is truly a three dimensional puzzle.
  I decided to make a chart to make sure I had every brick and that none had gotten broken or were cracked and needed to be replaced.
 I'm about half way through the puzzle at this point.
 The puzzle is complete. Each layer is laid out by row from bottom to top is layer A through K. Each brick in a layer is laid out across 1-11.
 By making the chart, I could easily see that all the brick were accounted for. A big sigh of relief!
 The next step was to take the rows and lay them out in the layers in the order and shape they would be laid out for the actual sculpture. By doing this, the mason could easily see what he would be working on, how it would go together. Since he was coming in to this project without having seen the completed wet sculpture, this would give him the information he needed to put the piece together. My husband offered the trailer to load the brick on, then he drove it across the yard to where the sculpture was going to be installed. It saved me carrying one ton of brick by hand across the yard. I only had to pick the brick up off the ground and put it on the trailer. it also saved my back some bending with all that weight.
  This is the top view of one of the layers.
 This is the trailer completely loaded with the mason, Doug Englebert, preparing the mortar.
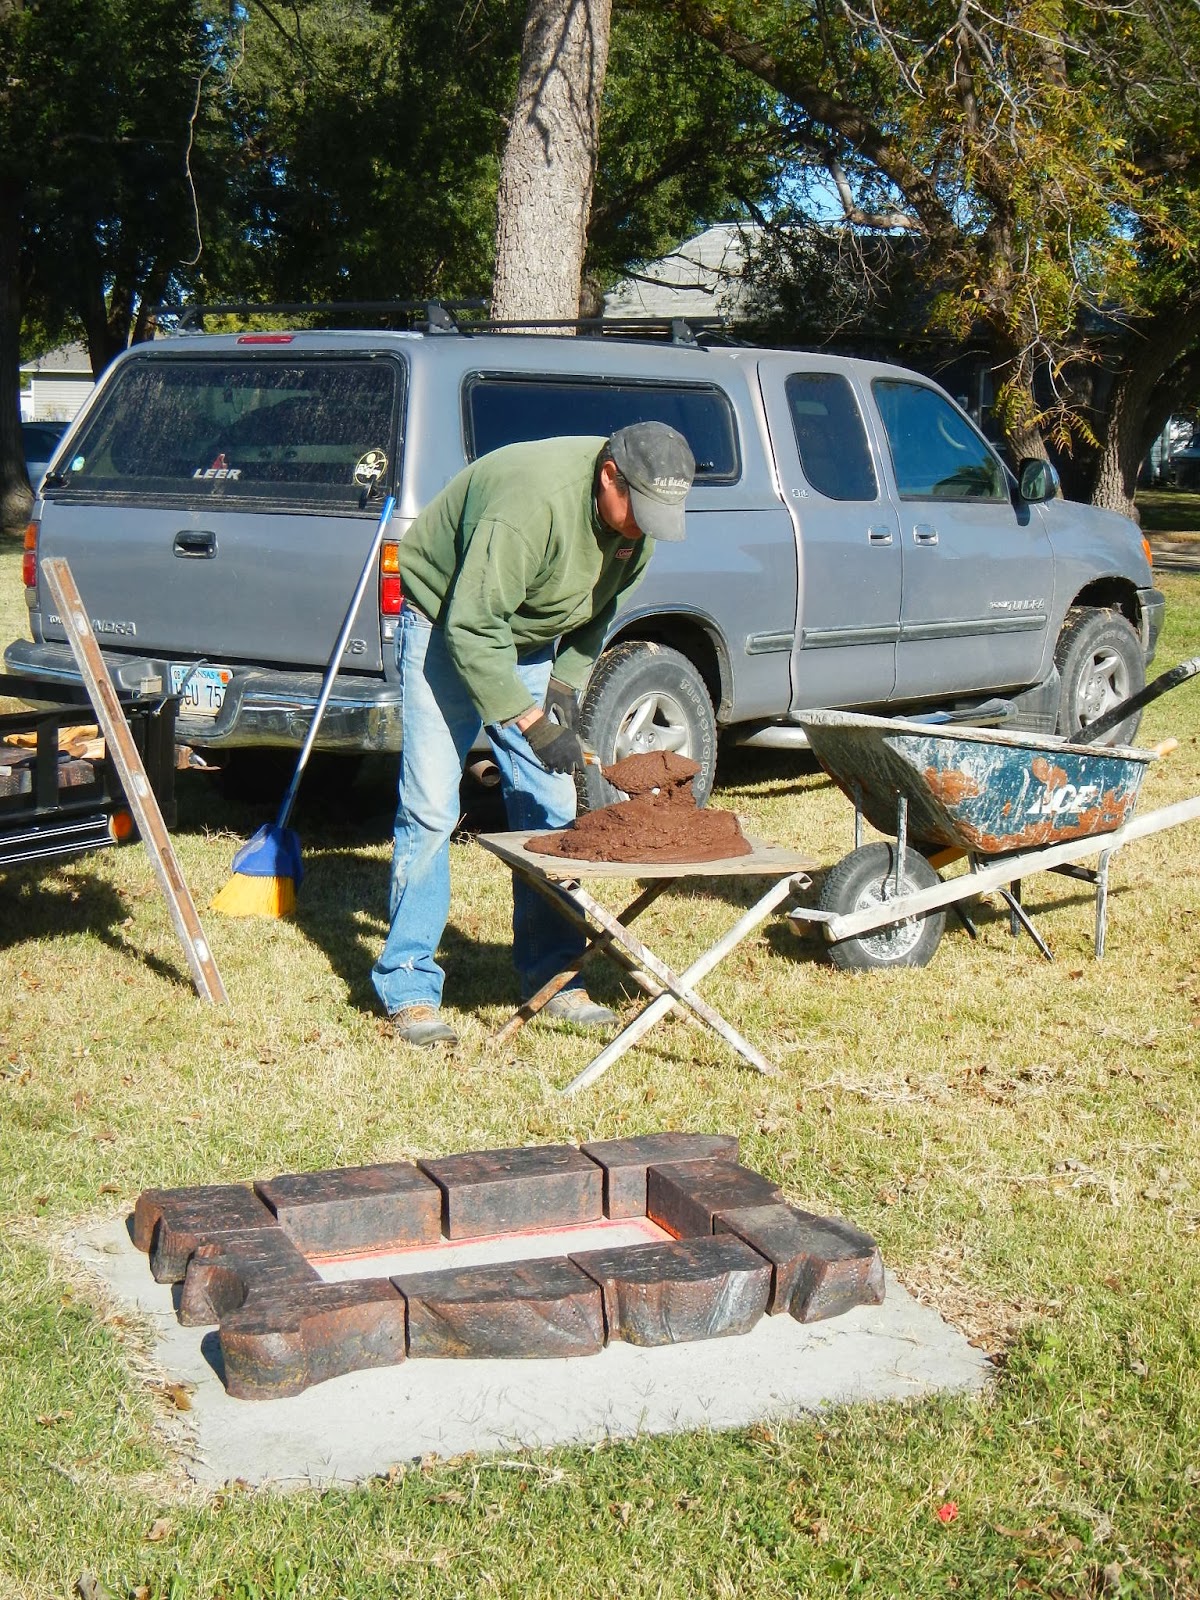 This is the first layer, "A", laid out on the cement base. You can see the red chalk line on the inside of the ring that will show the mason where to lay the initial layer of mortar. In the background, you can see him mixing the dye into the mortar so that it will match the color of the brick.
  A close up of the chalk outline that will guide the mason to proper placement of the brick.
 The mason adds the mortar along the chalk line in preparation of laying the first bricks.
 Continuing with the laying of the first layer.
 The first couple layers laid up. As the mason completes a layer, I had to go around and texturize the mortar to match the texture of the relief.
  Beginning to fill the center cavity with cement block. In the background, you can see the mason cutting the cement block to fit the center space. Mortar was applied between the layers of the cement block and the walls of the inside cavity. This provided the support for the seat of the bench.
 Cement blocks are dry and ready for the seat to be laid.
 Once the seat is laid, the beginning layers of arms and back (both inside and outside of the back of the sculpture) need to be laid out without mortar to make sure they will fit with the base of the sculpture. If there are any discrepancies, they need to be noted so that adjustments can be made with the mortar to make the relief flow throughout the design. This photo shows the back side of the back of the sculpture laid up.
  This view shows the front side of the back of the "chair" being installed.
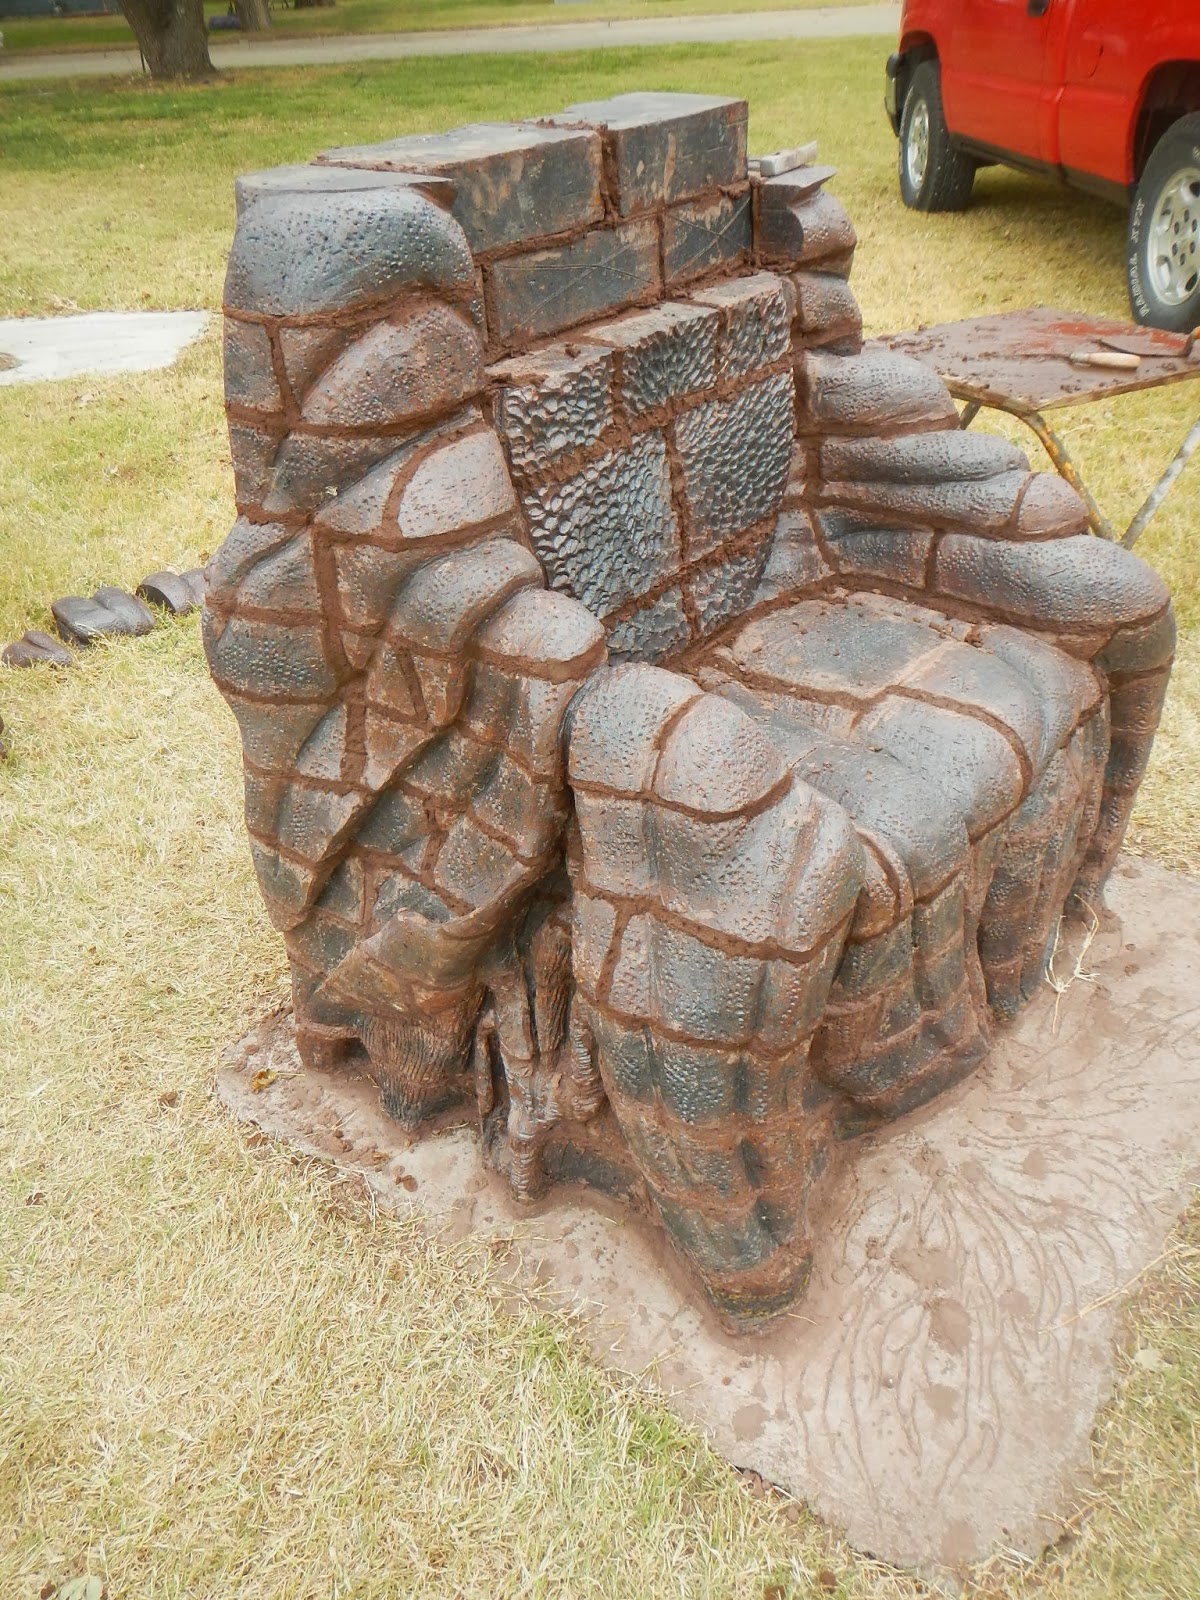 This is a good view of the two layers that made up the back of the "chair". The back was two bricks thick and was rather tricky to install.
  Front view of bench.
 Front & side view.
 Side and back view.
 Back view of the bench, facing my studio with the first 3'x6' brick carved wall mural, "Wind Spirit", and my husband's wood carving to the left.
 Another view of the bench in the sculpture garden in front of the studio.
I hope you have enjoyed this photo journey of creating the Sunflower bench sculpture. Working with brick is very a physical, labor intensive media. But the possibilities are almost boundless, the depth of relief exciting, and the satisfaction of seeing the completed sculpture installed is worth all the steps, all the labor, and fills my heart with joy!
A special thank you goes out to:
my first ceramics instructor from Fort Hays State University, Hays, KS, Darrell McGinnis, for his excellent guidance, patience and belief in me;
to Catharine Magel, ceramic artist from St. Louis, MO, who designed, orchestrated and carved the Whole Wall Project in the art department of CCCC, Concordia, KS for the Cloud County Historical Society. She was an incredible inspiration to all my students, the community and myself. She gave freely of her expertise and experience in working with public art projects and clay. It was a once in a lifetime experience for me and my students and we are forever grateful for the professionalism, the expertise, and the fun she brought to the department over the three years it took to produce the Whole Wall.
to Mara Smith, career brick carver from Seattle, WA, who was one of the assistants for the Whole Wall Project and who has since carved several other brick projects at the Cloud Ceramic brick facility outside of Concordia, KS. When she is in town, she has assisted me in presenting workshops to students and art teachers, and welcomed both my assistance as well as my students' help in carving, teaching and sharing her carving experiences and "tricks" with a generosity that is amazing.
These three wonderful people and artists have so generously shared their experience, information and passion for clay. They have touched my heart in such a special way and I hope that the spirit of their love and kindness comes through each piece that I make. Thank you all for the love and support you have shown me over the years. May God bless you as He has blessed me with your friendship.
Please feel free to leave a comment. I would be interested in hearing from you.
ReplyDelete